In the world of Liquid Silicone Rubber (LSR) injection molding, a common point of confusion arises right at the beginning: What is the difference between a sample LSR tool and a production mold? While the terms are sometimes used interchangeably, understanding their distinct purposes, designs, and cost structures is crucial for making informed decisions that affect your budget, timeline, and product quality.
Choosing the wrong type of tooling can lead to costly mistakes, project delays, and performance issues in your final product. This comprehensive guide will demystify these two critical components of LSR manufacturing, focusing on the key term “LSR tool”, and help you determine the right path for your project’s specific phase.
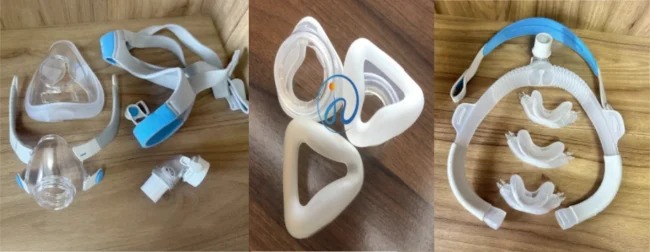
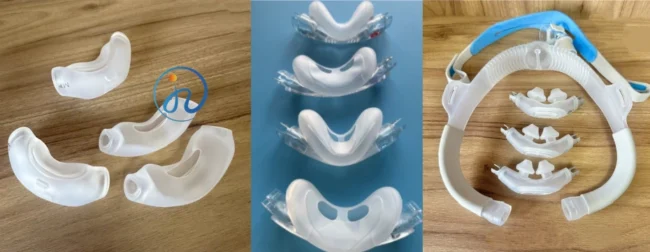
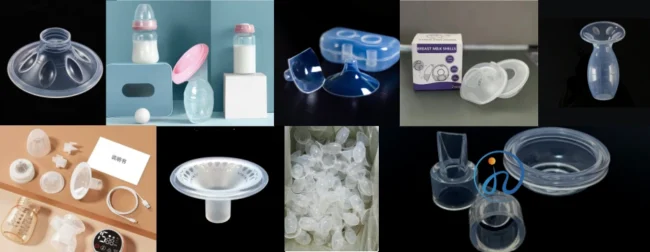
What is a Sample LSR Tool?
A sample LSR tool (often calling a prototype mold, soft tool, or bridge tool) is engineering for validation, not volume. Its core mission is to get functional parts into your hands as quickly and cost-effectively as possible. Think of it as a “test drive” for your design and material.
The primary objectives of a sample LSR tool are:
- Design Validation: Does the part fit, form, and function as intended?
- Material Testing: How does the chosen LSR grade perform? Does it meet the required medical, automotive, or consumer specifications?
- Market Testing: Can you create a small batch of parts for focus groups, clinical trials, or initial product launches?
- Identifying Flaws: It reveals design issues (e.g., wall thickness, gate locations, undercuts) before you invest in expensive production-grade tooling.
The keyword “LSR tool” is most commonly associating with this prototype phase, where the focus is on agility and learning.
What is a Production LSR Mold?
A production LSR mold is a capital investment built for scale, precision, and endurance. It is a hardened, high-precision piece of machinery designed to manufacture millions of parts with unwavering consistency and minimal downtime.
The primary objectives of a production mold are:
- High-Volume Output: To produce parts at the lowest possible cost per unit.
- Consistency and Repeatability: To ensure every single part, from the first to the millionth, is identical and meets all quality control metrics.
- Durability and Uptime: To withstand the immense clamping pressure, high temperatures (LSR cures at ~180-220°C), and abrasive nature of some silicone compounds over years of operation.
- Automation Efficiency: Designed to integrate seamlessly with automated part removal systems, cold runners, and other equipment for lights-out manufacturing.
Key Differences Explained: A Detailed Breakdown
1. Material and Construction: The Foundation of Durability
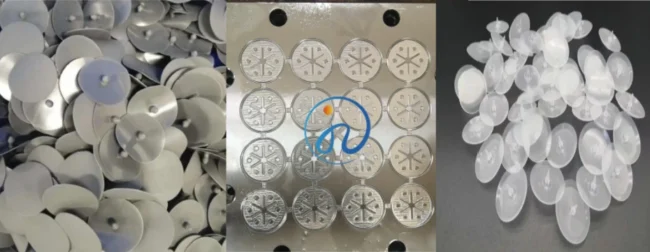
- Sample LSR Tool: Typically machined from softer, less durable materials like aluminum or mild steel (e.g., P20). Aluminum is favored for its excellent machinability, which drastically reduces lead time and cost. However, it wears down quickly under the high pressures and abrasive fillers in some LSRs, making it unsuitable for long runs.
- Production Mold: Exclusively crafted from hardened tool steels like H13 or stainless steel (e.g., 420SS, especially for medical-grade LSR). They are highly resistant to wear, corrosion, and polishing, ensuring the mold’s critical surfaces and fine details remain intact for millions of cycles.
2. Design and Complexity: Simple vs. Optimized
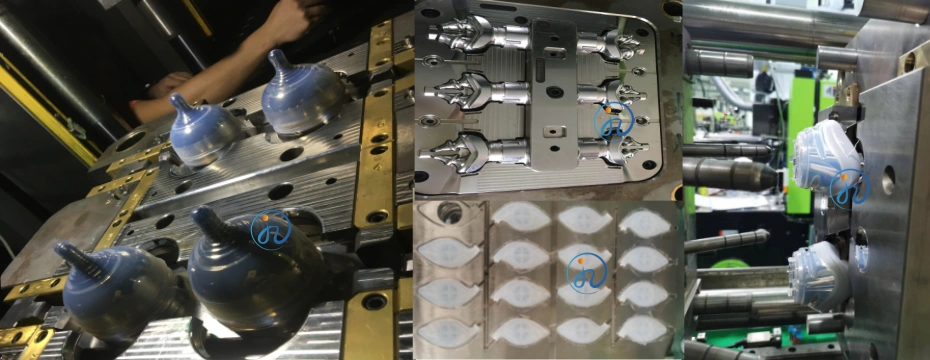
- Sample LSR Tool: Design is simplified for cost and speed. It’s often a single-cavity mold (producing one part per cycle). It may have basic cooling channels or even rely on the surrounding platen for temperature control. Ejection systems are straightforward. The focus is on “good enough” to produce a part, not on cycle time optimization.
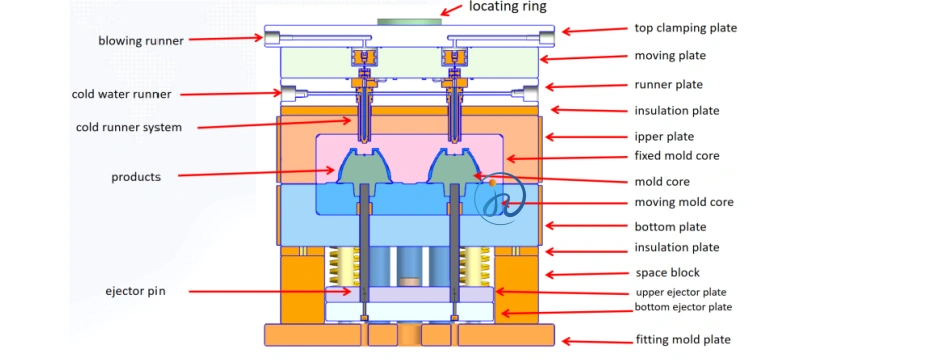
- Production Mold: Design is complex and heavily optimized. It is almost always a multi-cavity mold (e.g., 4, 8, 16, or even 64 cavities) to maximize output per cycle. It features highly engineered, conformal cooling channels that follow the part’s contour to ensure fast, uniform curing and minimize cycle times. It often incorporates advanced systems like cold runner systems to reduce material waste (a significant cost factor in LSR). Every detail is fine-tuned for efficiency.
3. Cost and Investment: Capex vs. Opex
- Sample LSR Tool: Lower capital expenditure (Capex). A sample tool might cost between $3,000 – $20,000. This lower financial barrier allows companies to de-risk projects and iterate designs without a massive upfront commitment.
- Production Mold: High Capex. A production mold can easily cost $50,000 – $150,000+, depending on size and complexity. The justification for this investment is the dramatically lower operational expenditure (Opex). The high efficiency and low scrap rate of a production mold drive down the cost per part, delivering a return on investment over high volumes.
4. Lead Time: Speed vs. Precision
- Sample LSR Tool: Short lead time, often 2 to 4 weeks. Softer materials are easier and faster to machine.
- Production Mold: Long lead time, typically 8 to 16 weeks. The process involves rough machining, heat treatment (which can cause distortion), finish machining, meticulous polishing, and detailed testing. The heat-treating and finishing stages alone add significant time.
5. Lifespan and Output Volume
- Sample LSR Tool: Lifespan is measured in hundreds or thousands of shots. Pushing a sample tool beyond its limits results in flash (material leaking into parting lines), dimensional inaccuracy, and eventual failure of the tool itself.
- Production Mold: Lifespan is designed for hundreds of thousands to millions of cycles. With proper maintenance, cleaning, and storage, a high-quality production mold can last for decades.
When to Use Which: A Strategic Guide
Choose a Sample LSR Tool (Prototype Mold) when you need to:
- Verify a new product design.
- Test material properties and biocompatibility.
- Secure funding or present samples to stakeholders.
- Fulfill a small initial order or conduct a market test.
- Your keyword focus: “rapid LSR prototyping,” “sample LSR tooling.”
Invest in a Production LSR Mold when you:
- Have a fully validated and approved part design.
- Have a forecast demanding high, sustained volumes.
- Require the lowest possible cost per part.
- Need absolute consistency and reliability for years.
- Your keyword focus: “high-volume LSR molding,” “production LSR mold design.”
The Bridge Tool: A Middle Ground
It’s worth noting that there is a middle option: the bridge tool. This is a sample tool built with more robust materials (e.g., pre-hardened steel) than aluminum but not to the full spec of a production mold. It can produce tens of thousands of parts, effectively “bridging” the gap between prototyping and full-scale production while the production mold is being built.
Conclusion: A Sequential Partnership, Not a Choice
Understanding the difference between a sample LSR tool and a production mold is not about choosing one over the other; it’s about understanding their sequential and complementary roles in the product development lifecycle.
The sample LSR tool is the agile, cost-effective scout that goes ahead to validate the terrain. The production mold is the powerful army that follows to secure the victory at scale. Investing in a well-made sample tool is a strategic move that safeguards your much larger investment in the production mold down the line.
By aligning your tooling strategy with your project’s current phase—using the keyword “LSR tool” to navigate the prototyping stage—you ensure a smoother, more efficient, and ultimately more successful journey from a brilliant idea to a mass-produced reality.